Introduction
[UPDATE 2019-03-10] I did an update on the module introducing some new features. You should read the update first before continuing here:
ExportImportRdsDeployment module has been updated and it has Backup functionalities now
As documented in this article, the first step to upgrade your Windows Server 2012R2 Remote Desktop Services (RDS) deployment to Windows Server 2016 is upgrading your Connection Broker. This can be done using an in-place upgrade, but this not always ideal:
- The in-place upgrade takes quite some time depending on various factors, like hardware, installed software, etc.
- The upgrade can fail, causing you to rollback and increases downtime
- There are numerous articles that discourage an in-place upgrade due to performance issues, legacy application problems, …
- On Azure, an in-place upgrade is not supported! So you cannot upgrade your Windows there.
ASPEX has a customer that was using a Windows 2012R2 RDS deployment and we told him about the HTML5 webclient that was in Public Preview at that time, which would be a great asset to the end users. The big problem: the HTML5 webclient requires a 2016 RDS Deployment. We suggested to upgrade the RDS deployment from 2012R2 to 2016, but the customer requested a minimal downtime and a phased migration. This ruled out an in-place upgrade, so I started coding…
The solution
I created a Powershell module that contains 4 functions. Each function is a step in the process to migrate your RDS deployment from one Connection Broker to another. The module will allow you to export your existing Session Collections and RD Servers with all configuration settings, and remove them from the old Connection Broker. Then you can import everything back into the new Deployment, connecting the RD Servers to the new Connection Broker and recreate the Collections.
There are several scenario’s where you can use this module:
- Migrate from one Connection Broker to another
- Upgrade from a 2012R2 to 2016/2019 RDS deployment
- etc
The module has been made available in the Powershell Gallery, so you can easily install and use it on any Windows Server.
The module will only migrate these RD roles: RD Gateway, RD Web Access & RD Session Host The other roles (RD Connection Broker & RD Licensing Server) should already be installed on the new Connection Broker
Note:
Only Session-based Desktop Deployments (Session Collections and Personal Session Desktops) are currently supported! If you have a Virtual machine-based desktop deployment (using a Virtualization Host), you should not use this Module!
You should always make sure you have a backup of your Connection Broker config before you start. Testing the module on your Dev environment is always a best-practice.
The overview
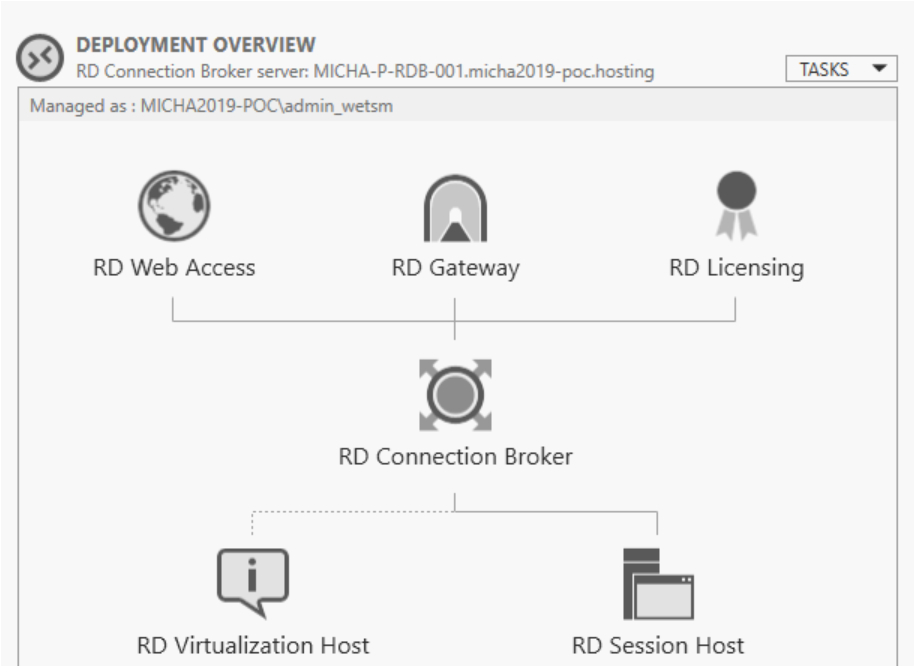
Deployment on the old Connection Broker
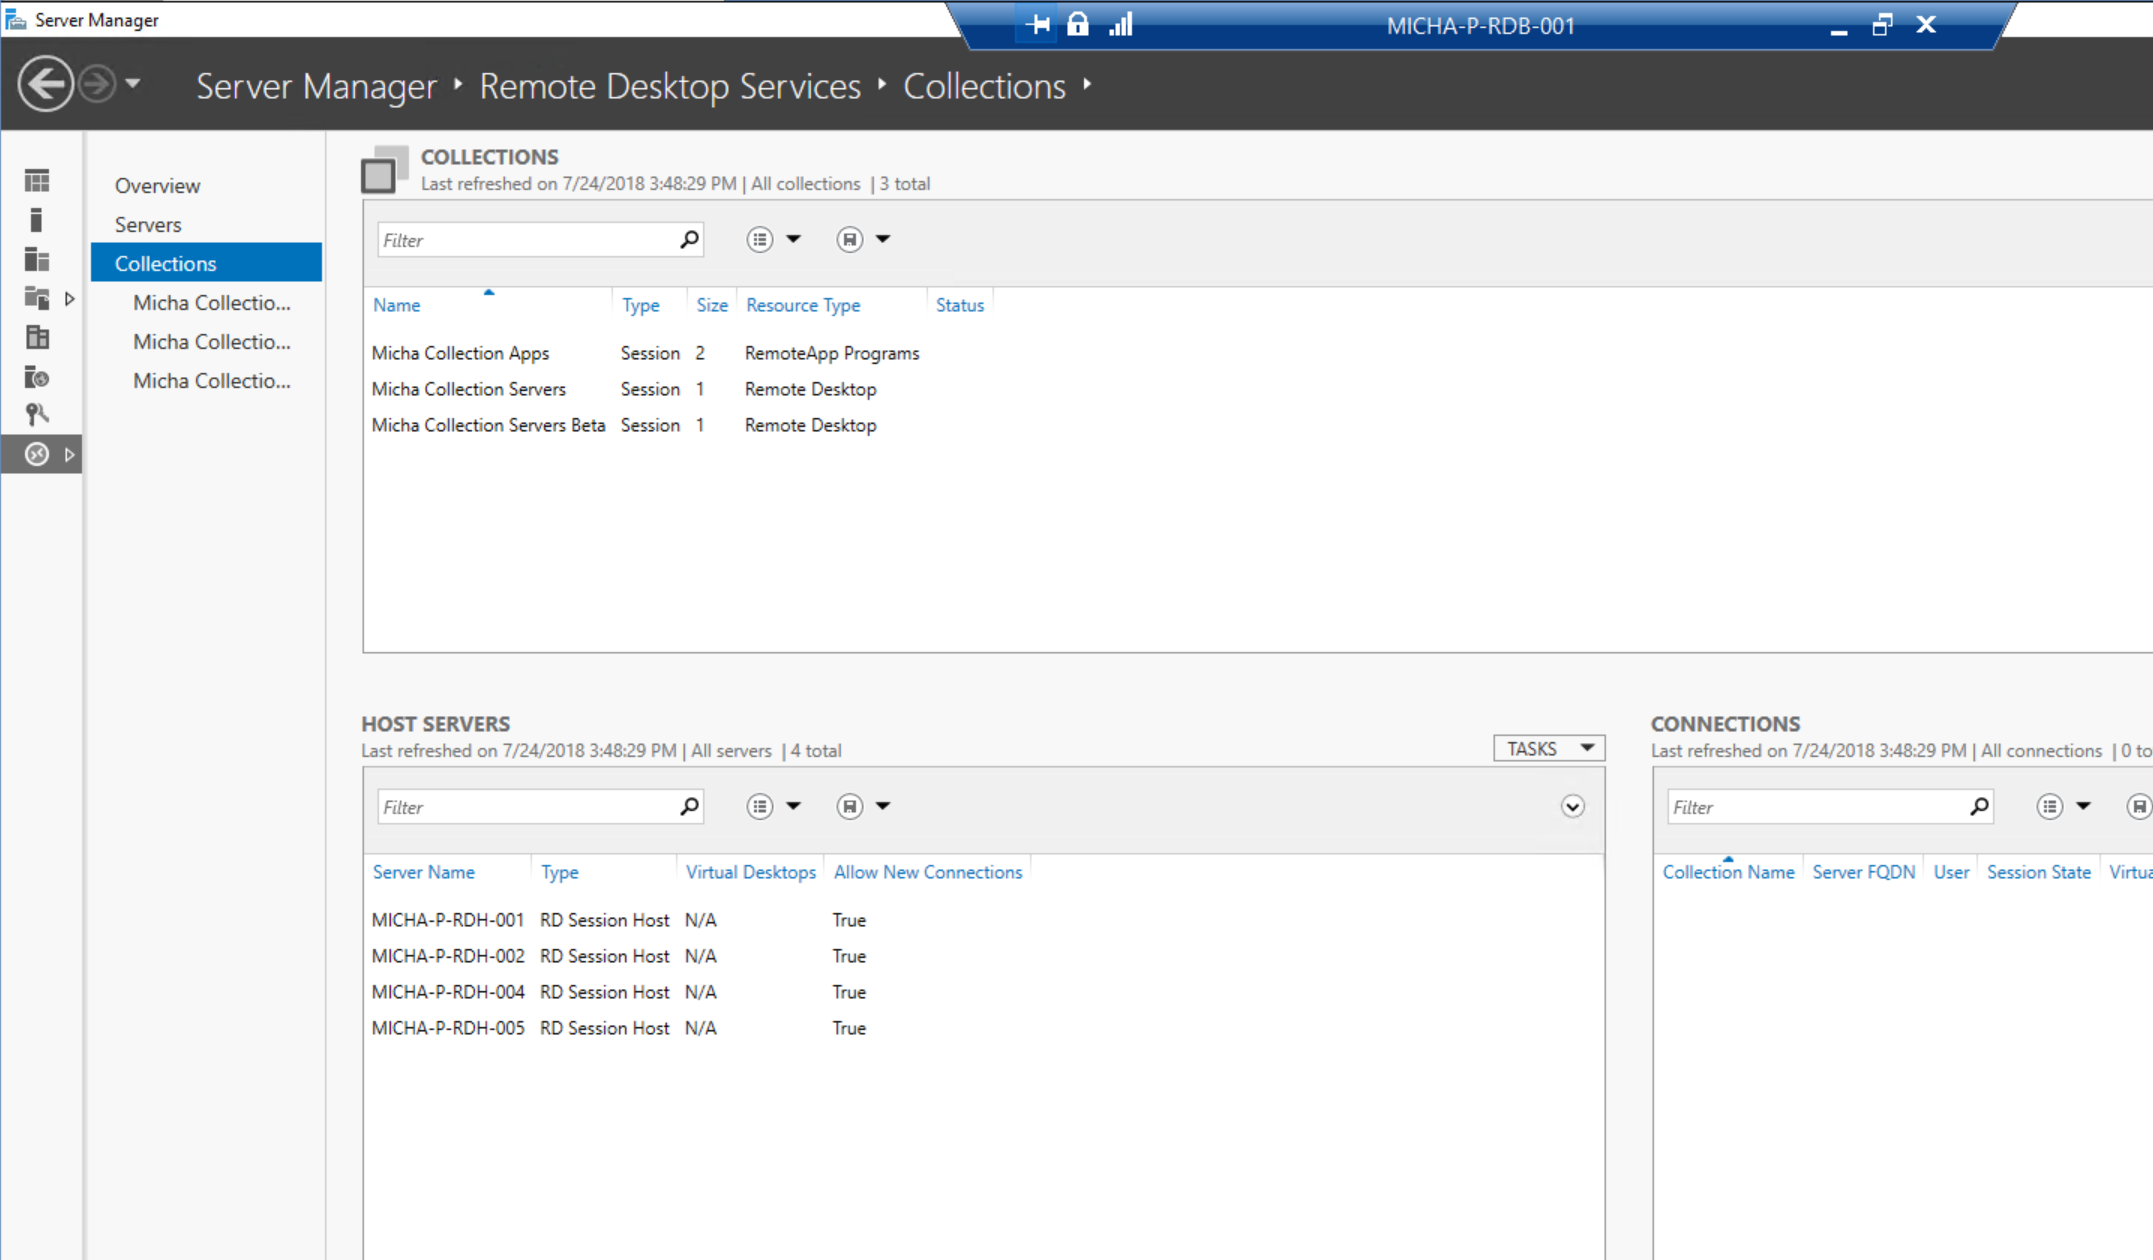
This is how my test deployment looks like: Domain: MICHA2019-POC.HOSTING
1x server as old Connection Broker & Licensing: MICHA-P-RDB-001 1x server as Gateway & Web Access: 2019-TEST-RDG1 6x servers as Session Hosts: MICHA-P-RDH-001 ==> 006
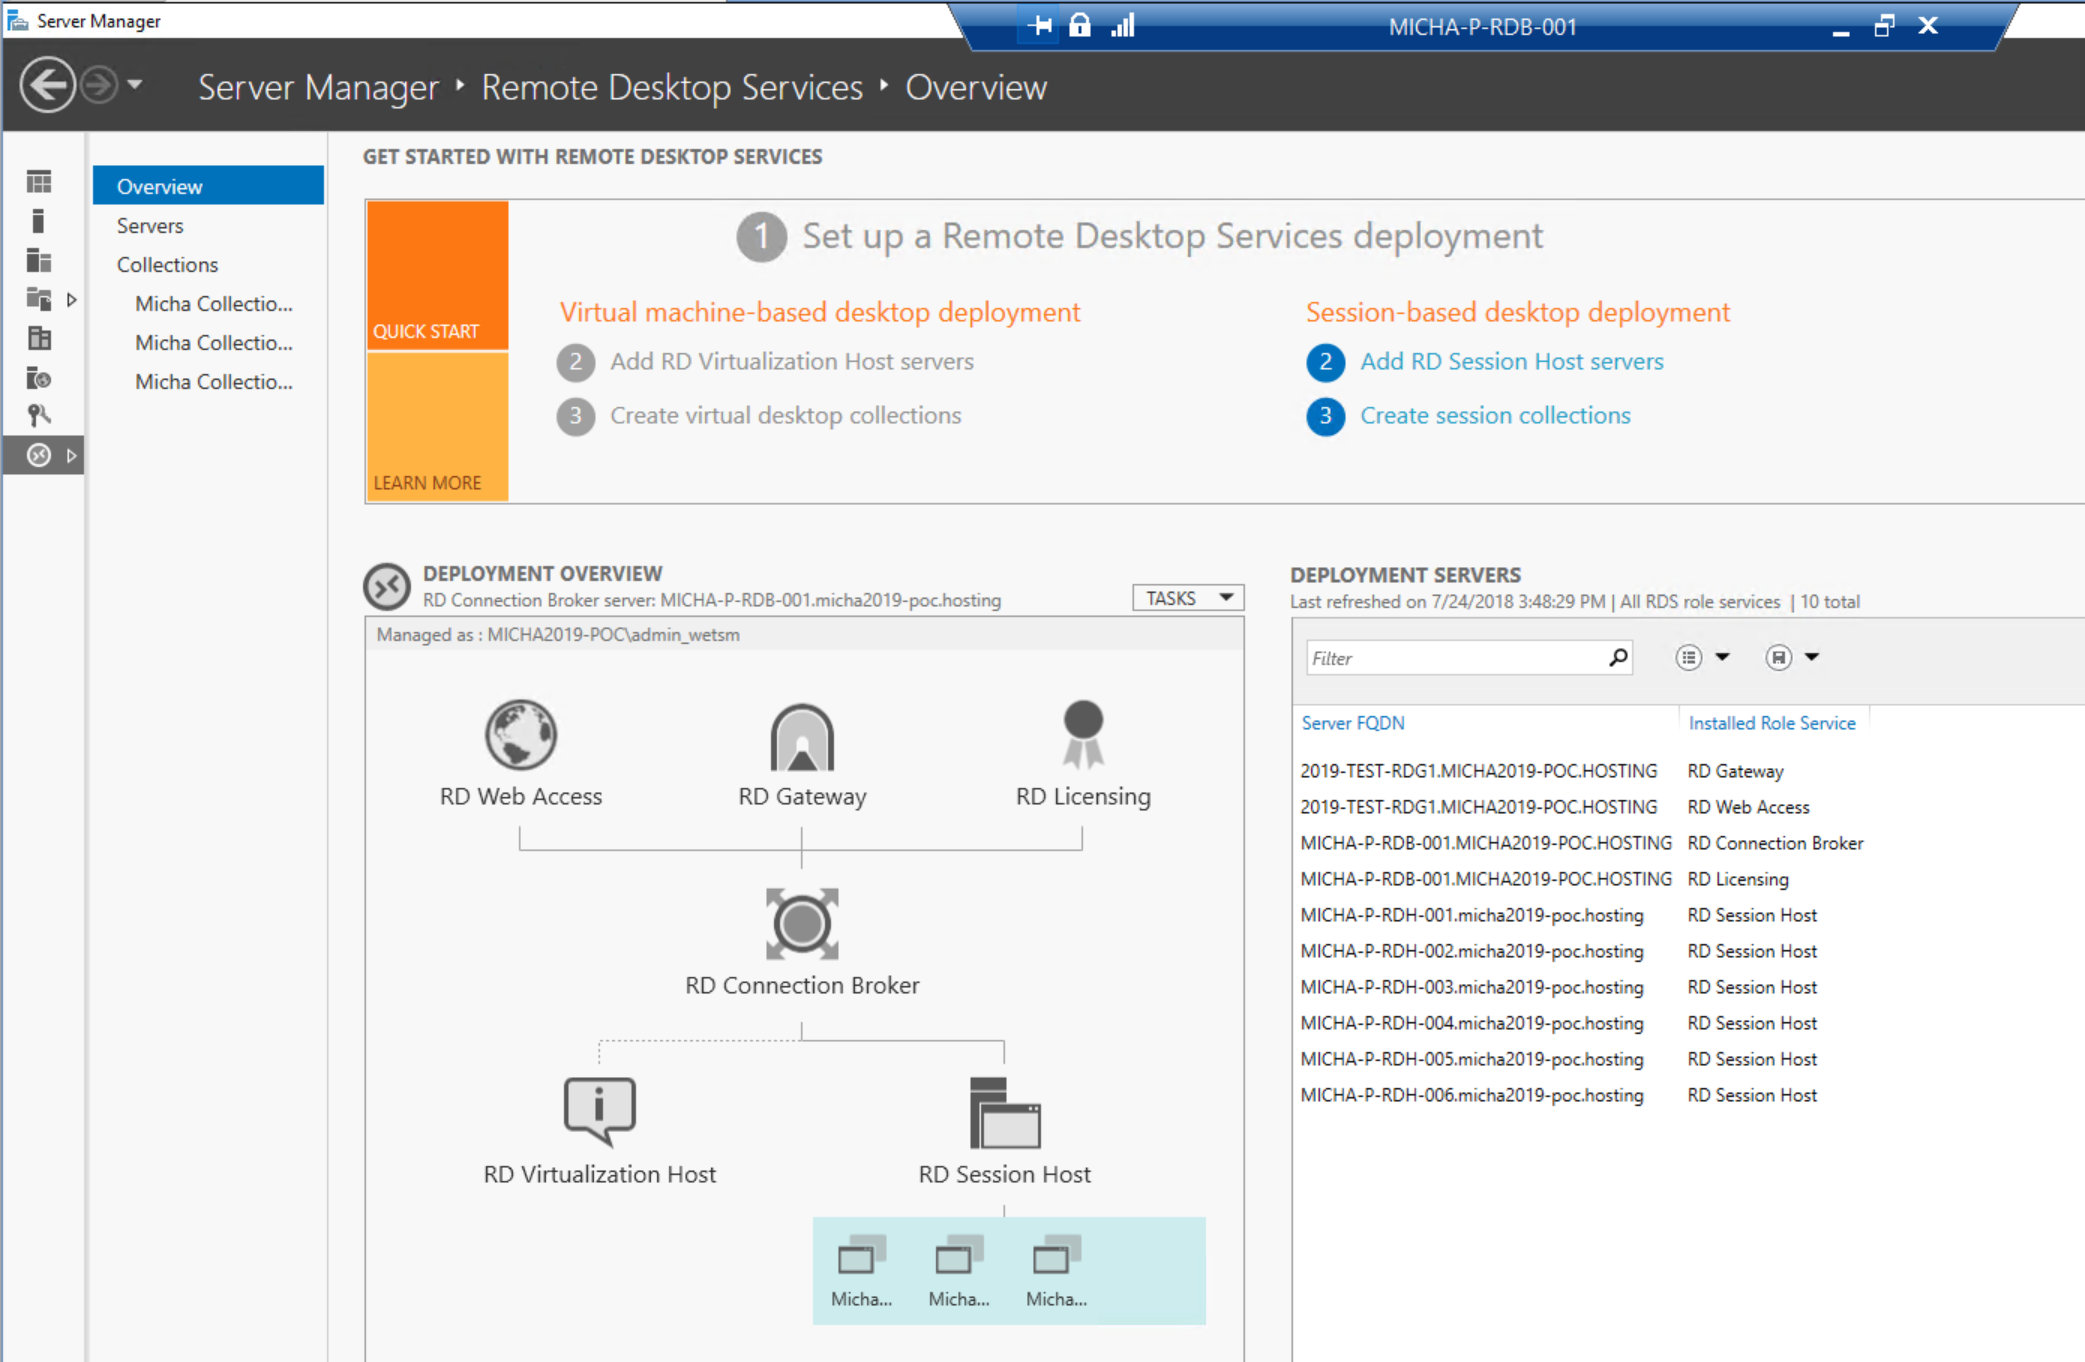
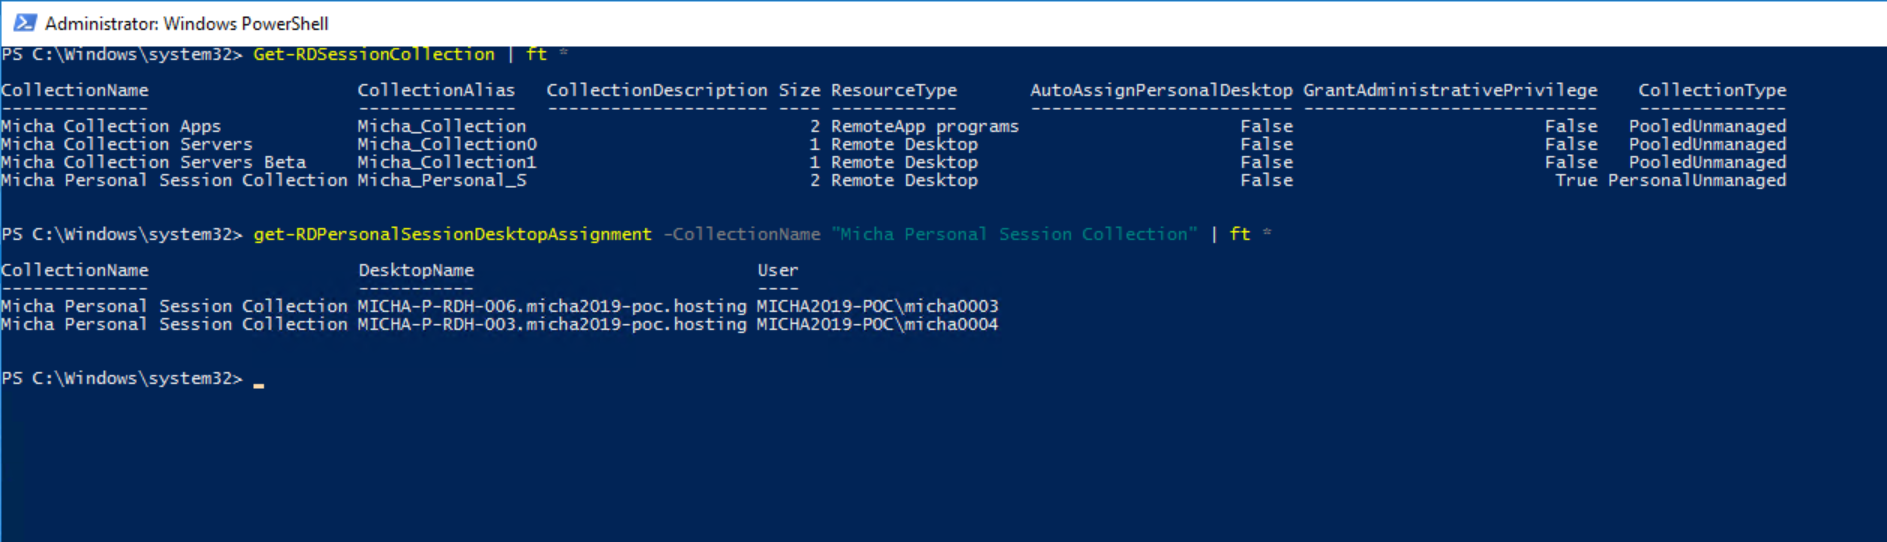
I have 3 Session Collections (1 with Remote Apps and 2 with Remote Desktops) and 1 Personal Session Desktop Collection. These are all divided over the available Session Hosts, as you can see in the screenshots below.

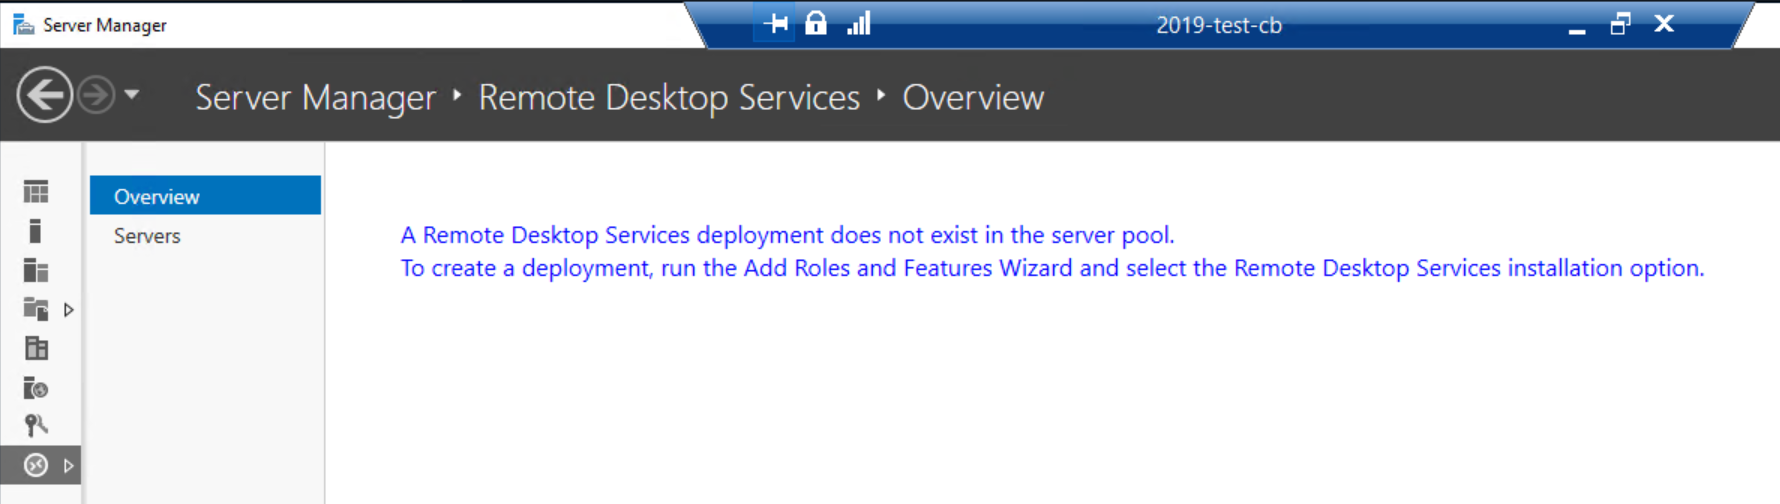
New Connection Broker
1x server as new Connection Broker & Licensing: 2019-TEST-CB I only installed the 2 roles on the 2019-TEST-CB machine. It is recommended to install the Licensing role on the new Connection Broker server. 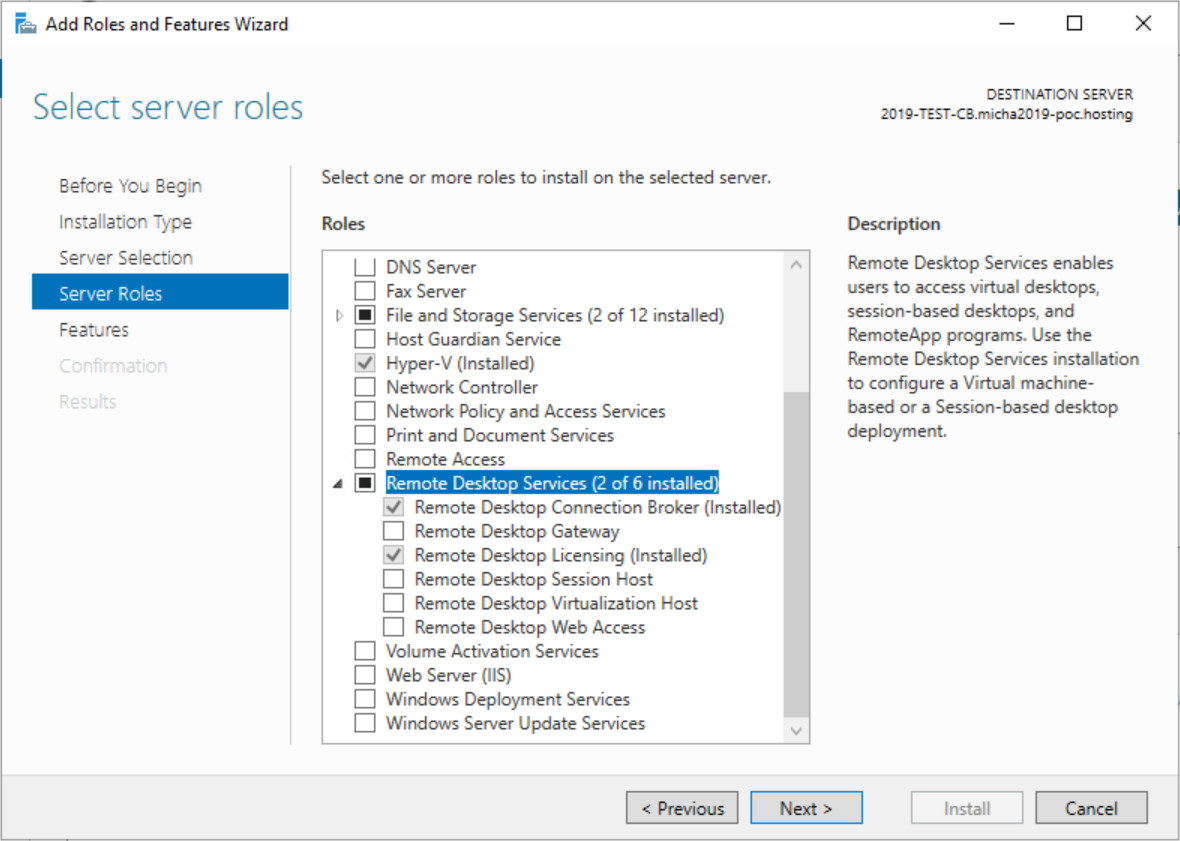
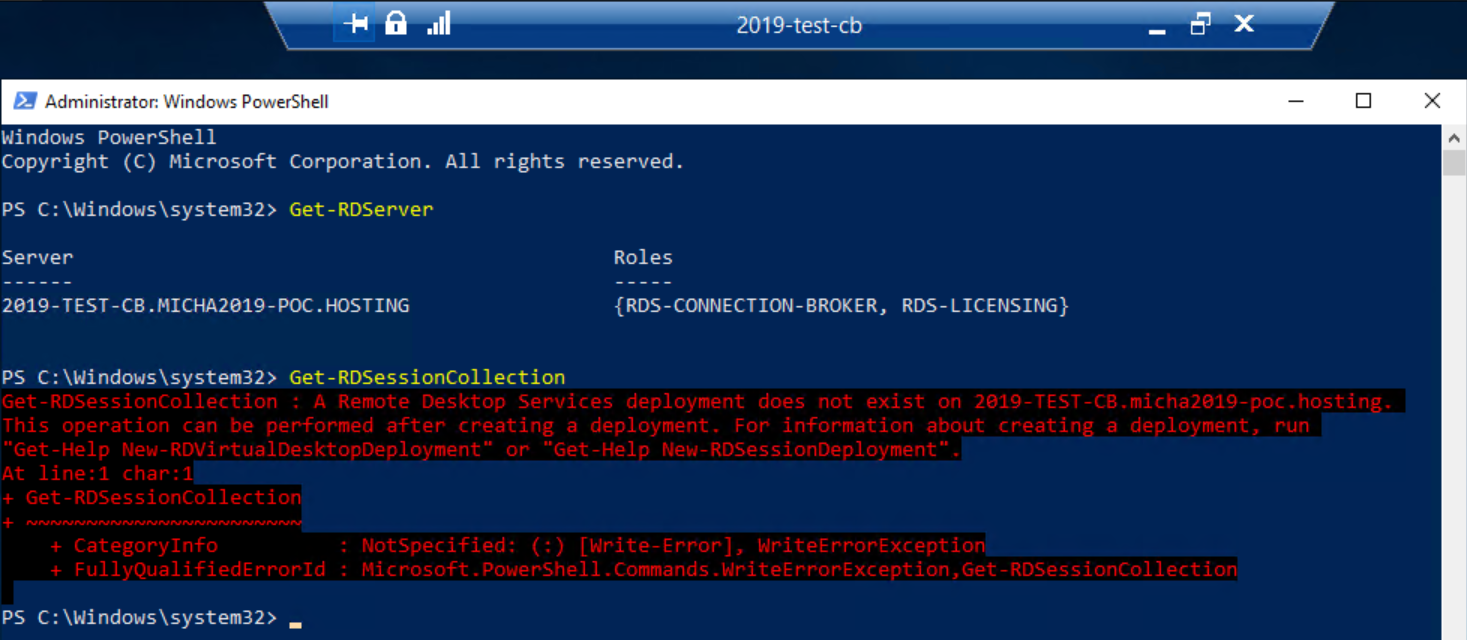
Objective
For this blog, I’m going export the Session Collections, Sessions Hosts, Gateway and Web Access servers from MICHA-P-RDB-001 to 2019-TEST-CB
The migration
Installation
To install the Module, you simply run these 2 commands:
Install-Module ExportImportRdsDeployment -Force
Import-Module ExportImportRdsDeployment
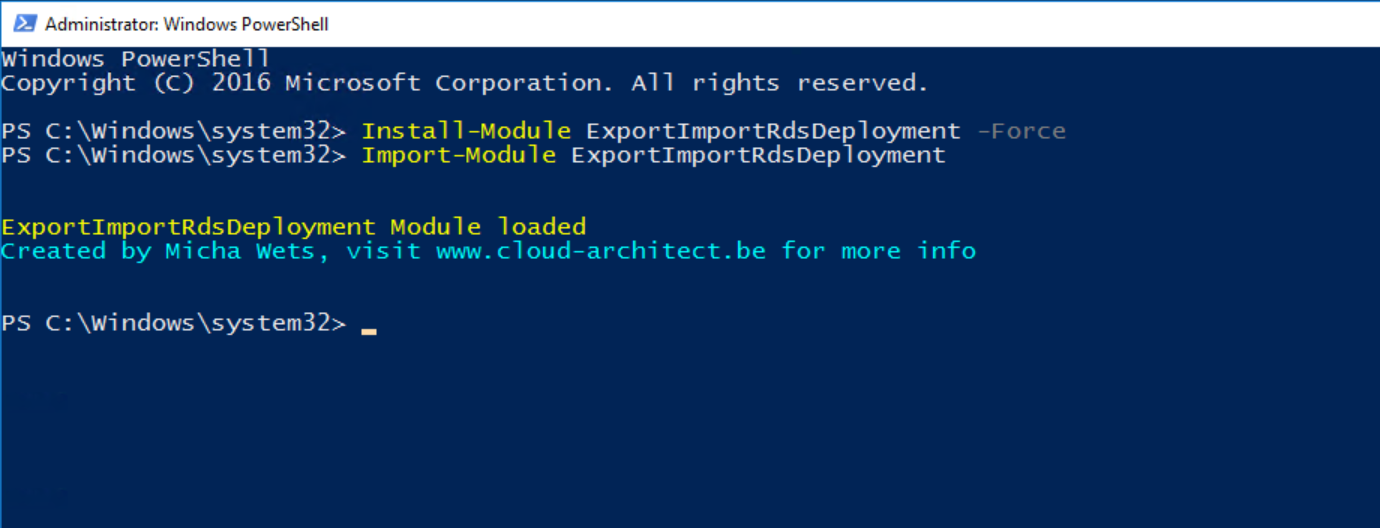
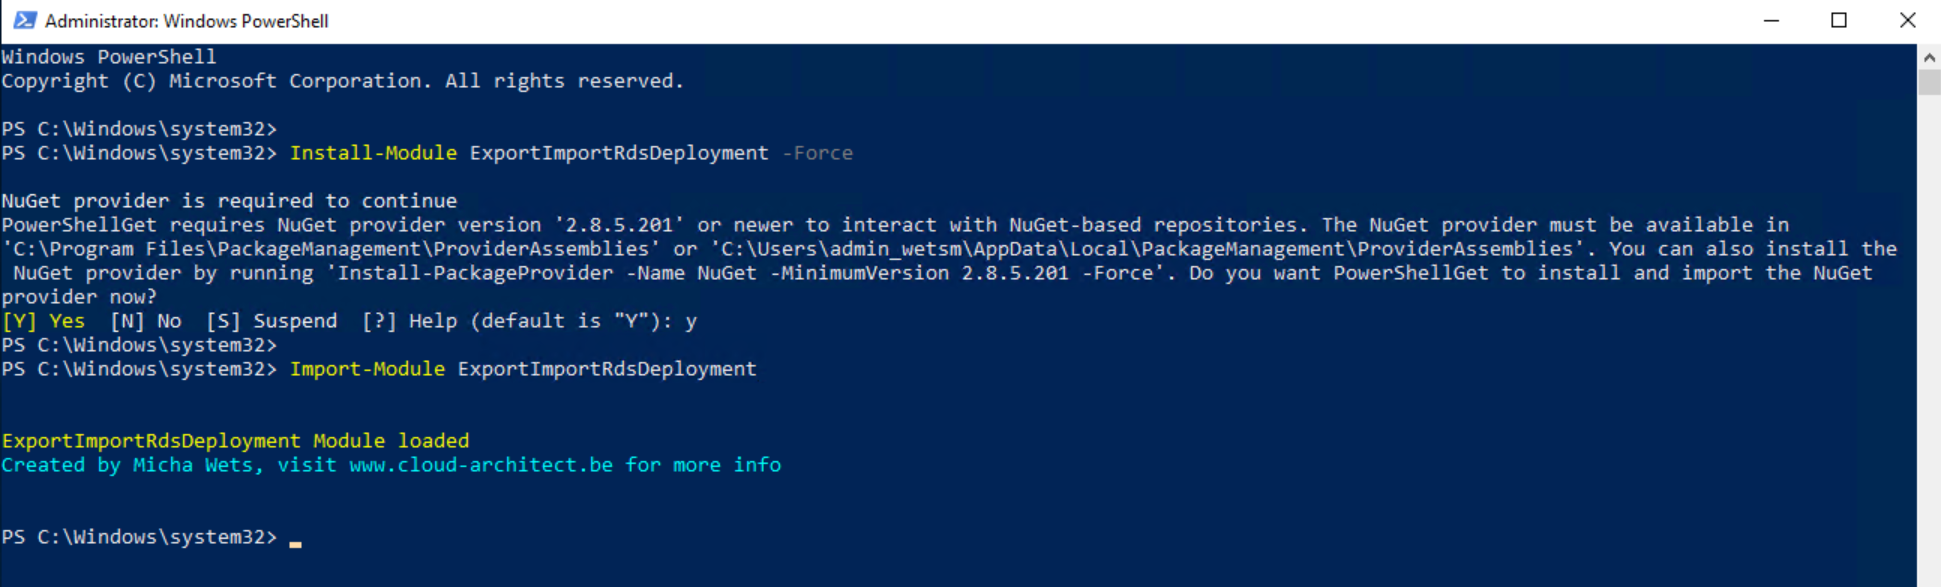
The module is uploaded to the Powershell Gallery, therefor you can easily install it, and it is signed using a Code Signing certificate. If you get a message regarding the Nuget provider, you should confirm to install the module
Export
Install Module
Install the module on the old Connection Broker:
Install-Module ExportImportRdsDeployment -Force
Import-Module ExportImportRdsDeployment
Collections
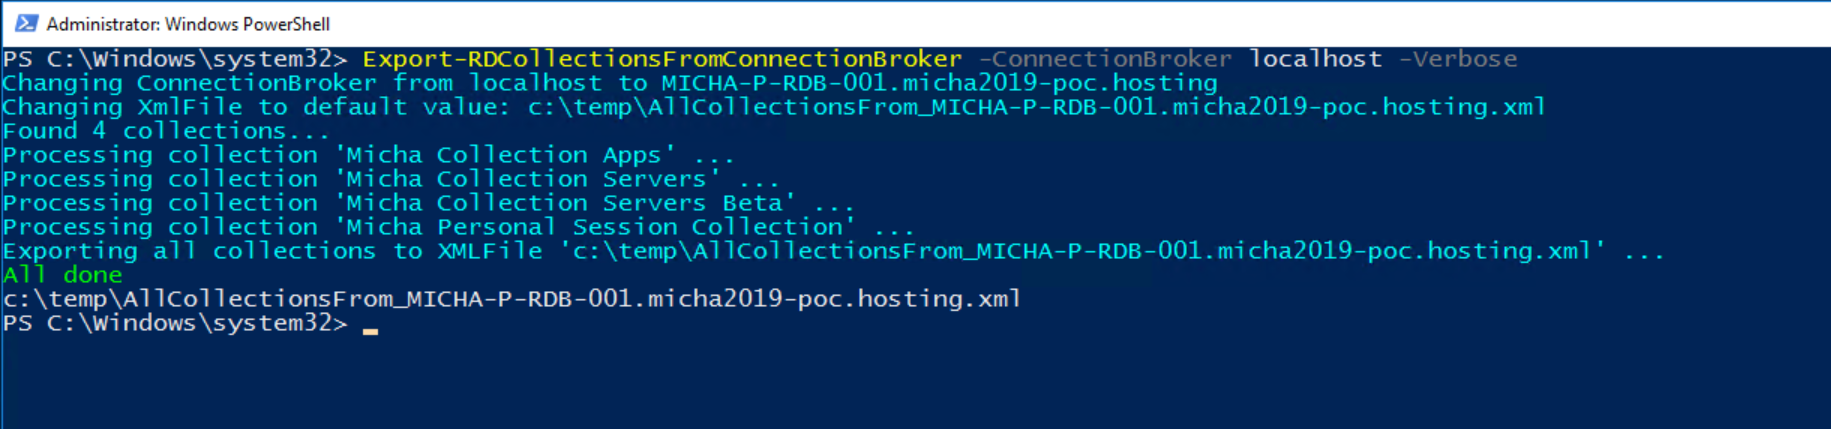
First step is to export the Session Collections. The module will export the collections to a XMLfile, so it can be easily migrated to the new Connection Broker. You export the collections using this command:
Export-RDCollectionsFromConnectionBroker -ConnectionBroker localhost -Verbose
You must specify the ConnectionBroker and optionally the XmlFile. And if you add -Verbose, you will get detailed steps in the progress

When finished, you will get the location of the XMLFile (default: in C:\temp, unless specified otherwise).
Deployment
Next step is to export the Deployment (including the servers). You export the deployment using this command:
Export-RDDeploymentFromConnectionBroker -ConnectionBroker localhost -Verbose
You must specify the ConnectionBroker and optionally the XmlFile. And if you add -Verbose, you will get detailed steps in the progress Note: You have to confirm that you exported the Session Collections before running this step.
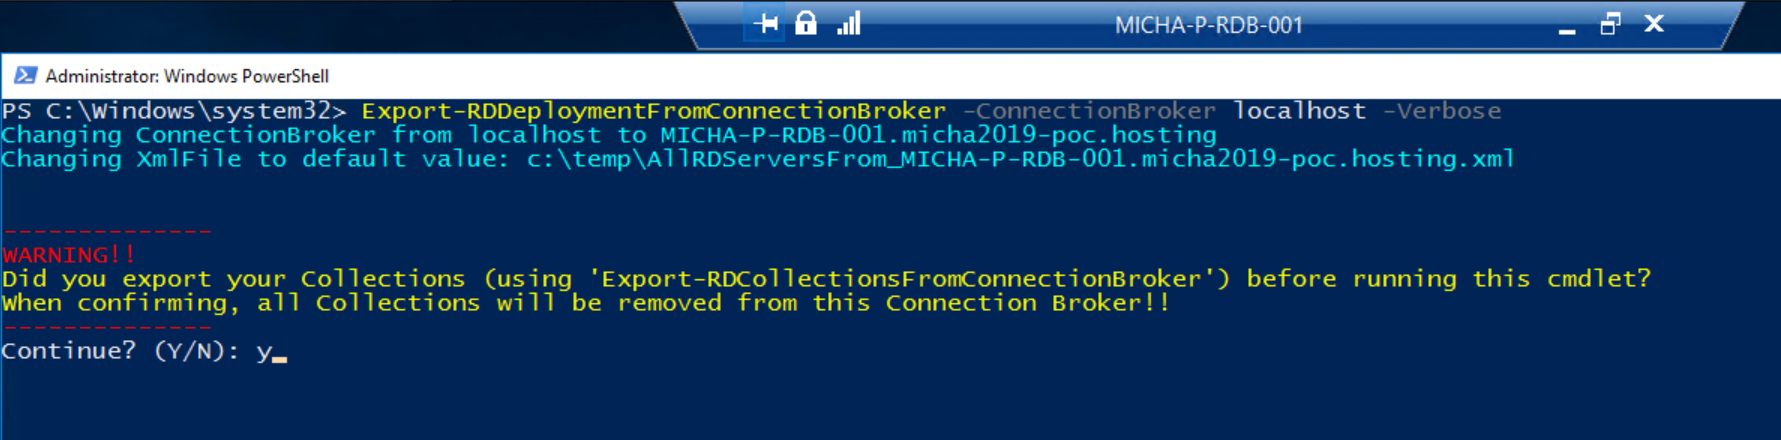
When finished, you will get the location of the XMLFile (default: in C:\temp, unless specified otherwise). The error message (as displayed below) is default behavior due to the removal of the Gateway Role from the deployment.

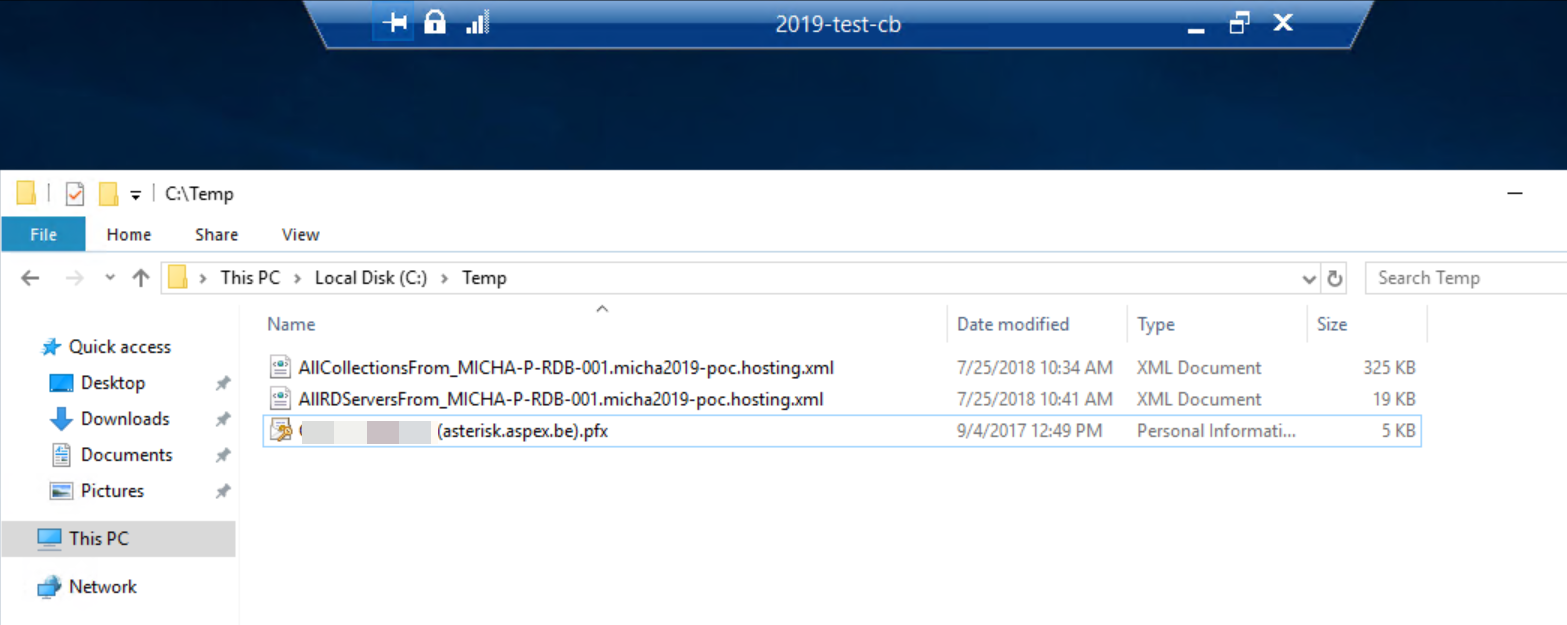
Export Files
When both exports are completed, you will find the XMLfiles in the export location. These files should be used when importing to the new Connection Broker.

Import
Install Module
Install the module on the new Connection Broker
Install-Module ExportImportRdsDeployment -Force
Import-Module ExportImportRdsDeployment
Import Files
Copy the XMLfiles to the new Connection Broker, unless exported to a shared network location. You also need the certificate(s) for all 4 roles in the deployment: RDGateway, RDWebAccess, RDPublishing & RDRedirector In this test migration, I used a wildcard certificate for all 4 roles. I placed all files in the C:\temp folder
Deployment
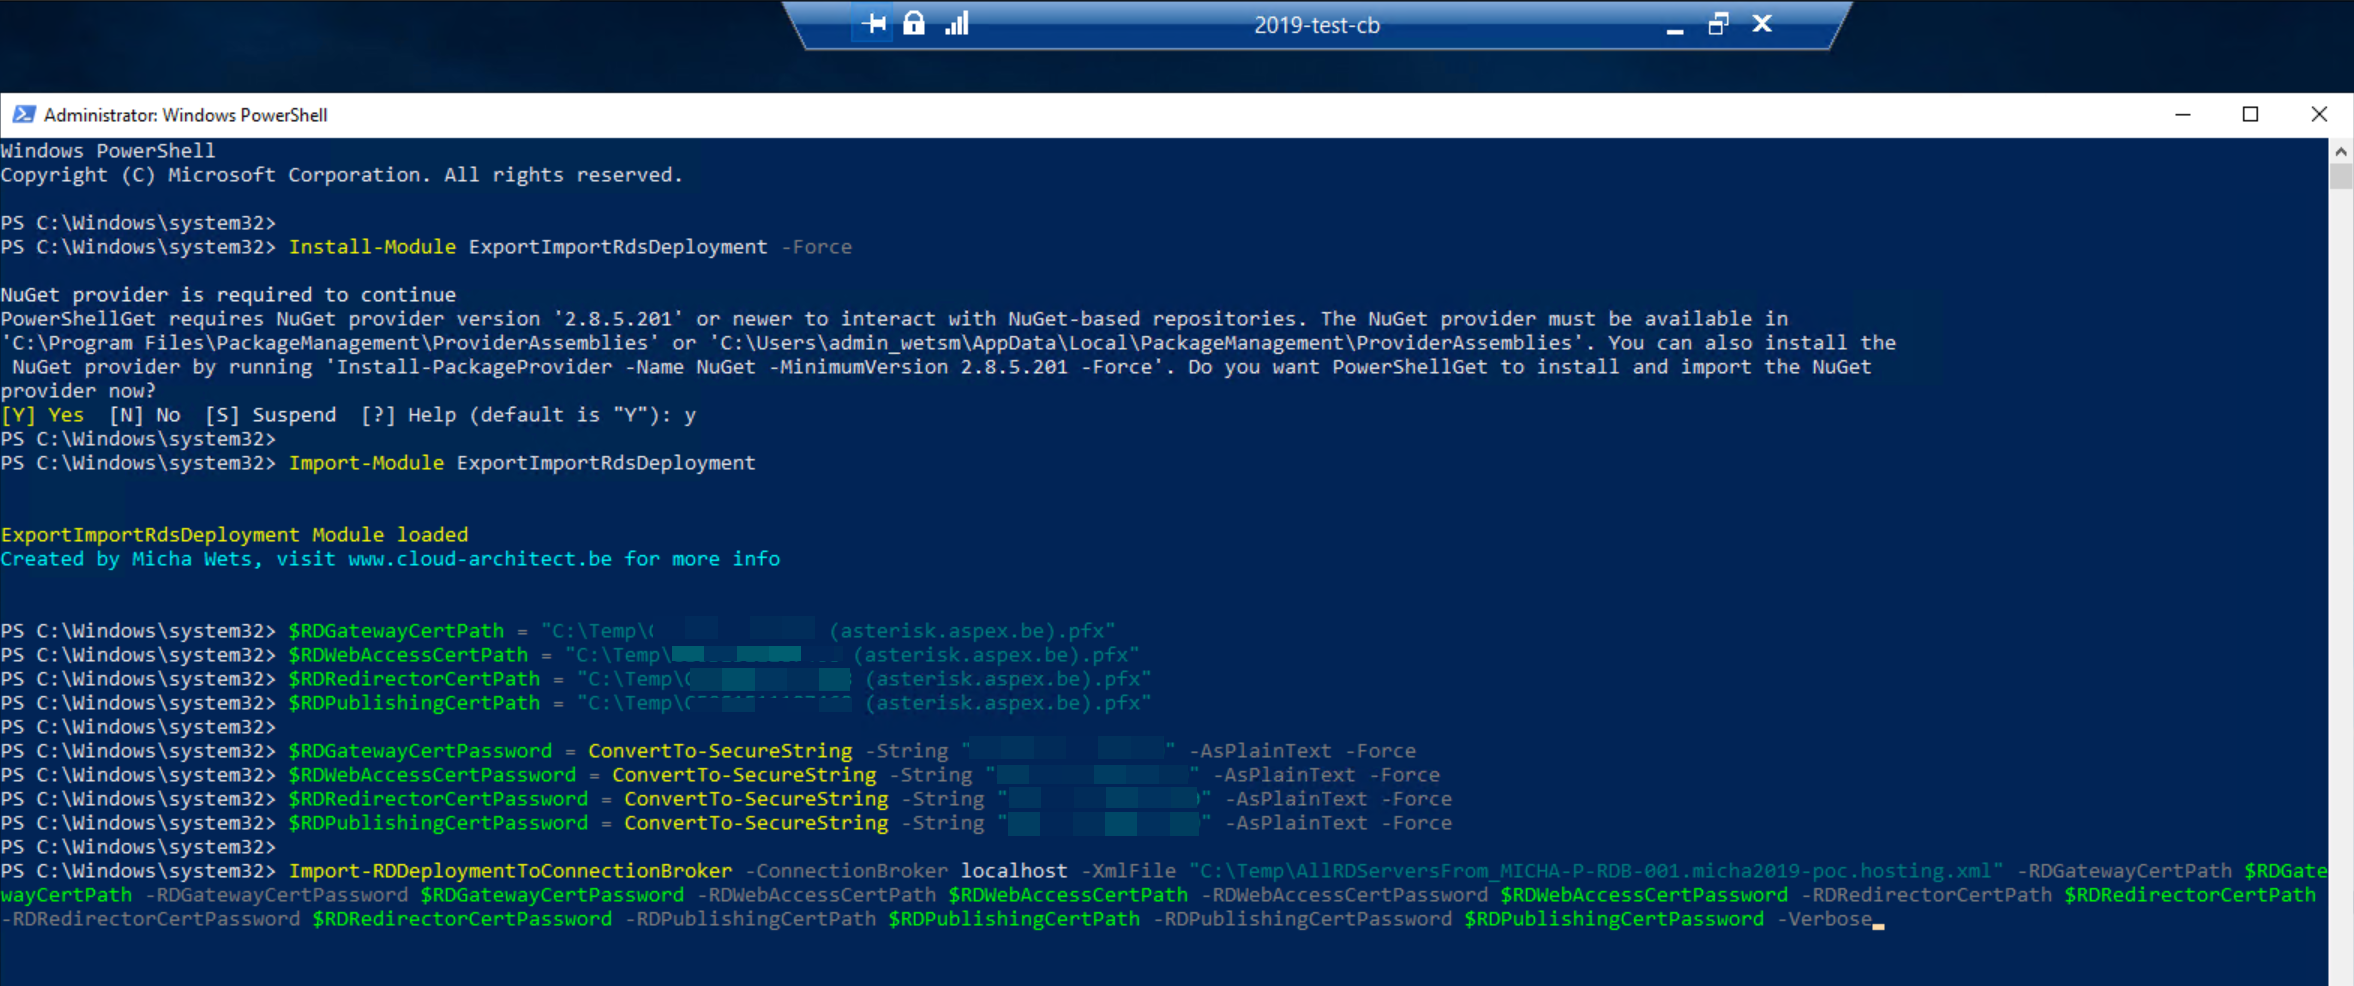
First step is to import the Deployment (including the servers). You import the deployment using these commands:
$RDGatewayCertPath = "C:\\Temp\\CEO\*\*\*\*\*\*\*\*\*\*\*\*\* (asterisk.aspex.be).pfx"
$RDWebAccessCertPath = "C:\\Temp\\CEO\*\*\*\*\*\*\*\*\*\*\*\*\* (asterisk.aspex.be).pfx"
$RDRedirectorCertPath = "C:\\Temp\\CEO\*\*\*\*\*\*\*\*\*\*\*\*\* (asterisk.aspex.be).pfx"
$RDPublishingCertPath = "C:\\Temp\\CEO\*\*\*\*\*\*\*\*\*\*\*\*\* (asterisk.aspex.be).pfx"

$RDGatewayCertPassword = ConvertTo-SecureString -String "\*\*\*\*\*\*\*\*\*\*\*\*\*" -AsPlainText -Force
$RDWebAccessCertPassword = ConvertTo-SecureString -String "\*\*\*\*\*\*\*\*\*\*\*\*\*" -AsPlainText -Force
$RDRedirectorCertPassword = ConvertTo-SecureString -String "\*\*\*\*\*\*\*\*\*\*\*\*\*" -AsPlainText -Force
$RDPublishingCertPassword = ConvertTo-SecureString -String "\*\*\*\*\*\*\*\*\*\*\*\*\*" -AsPlainText -Force

Import-RDDeploymentToConnectionBroker -ConnectionBroker localhost -XmlFile "C:\\Temp\\AllRDServersFrom\_MICHA-P-RDB-001.micha2019-poc.hosting.xml" -RDGatewayCertPath $RDGatewayCertPath -RDGatewayCertPassword $RDGatewayCertPassword -RDWebAccessCertPath $RDWebAccessCertPath -RDWebAccessCertPassword $RDWebAccessCertPassword -RDRedirectorCertPath $RDRedirectorCertPath -RDRedirectorCertPassword $RDRedirectorCertPassword -RDPublishingCertPath $RDPublishingCertPath -RDPublishingCertPassword $RDPublishingCertPassword -Verbose
You must specify the ConnectionBroker and the XmlFile, and the 4 certificate locations and passwords. And if you add -Verbose, you will get detailed steps in the progress.
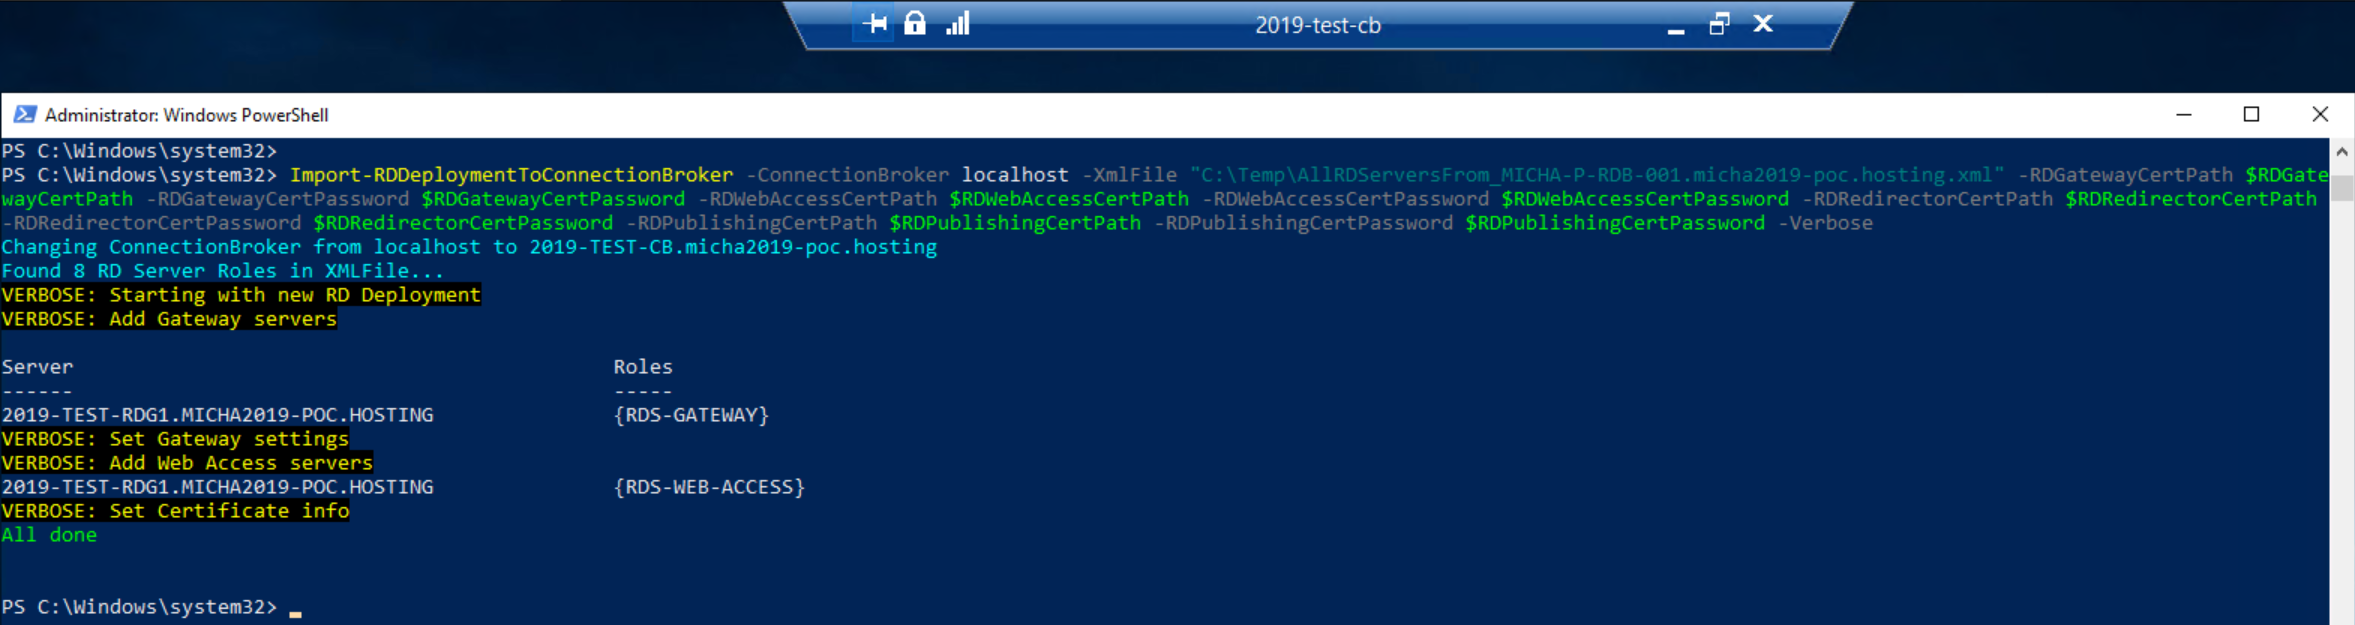
When finished, you will get an summary of the imported deployment.
Collections
Next step is to import the Session Collections. You import the collections using this command:
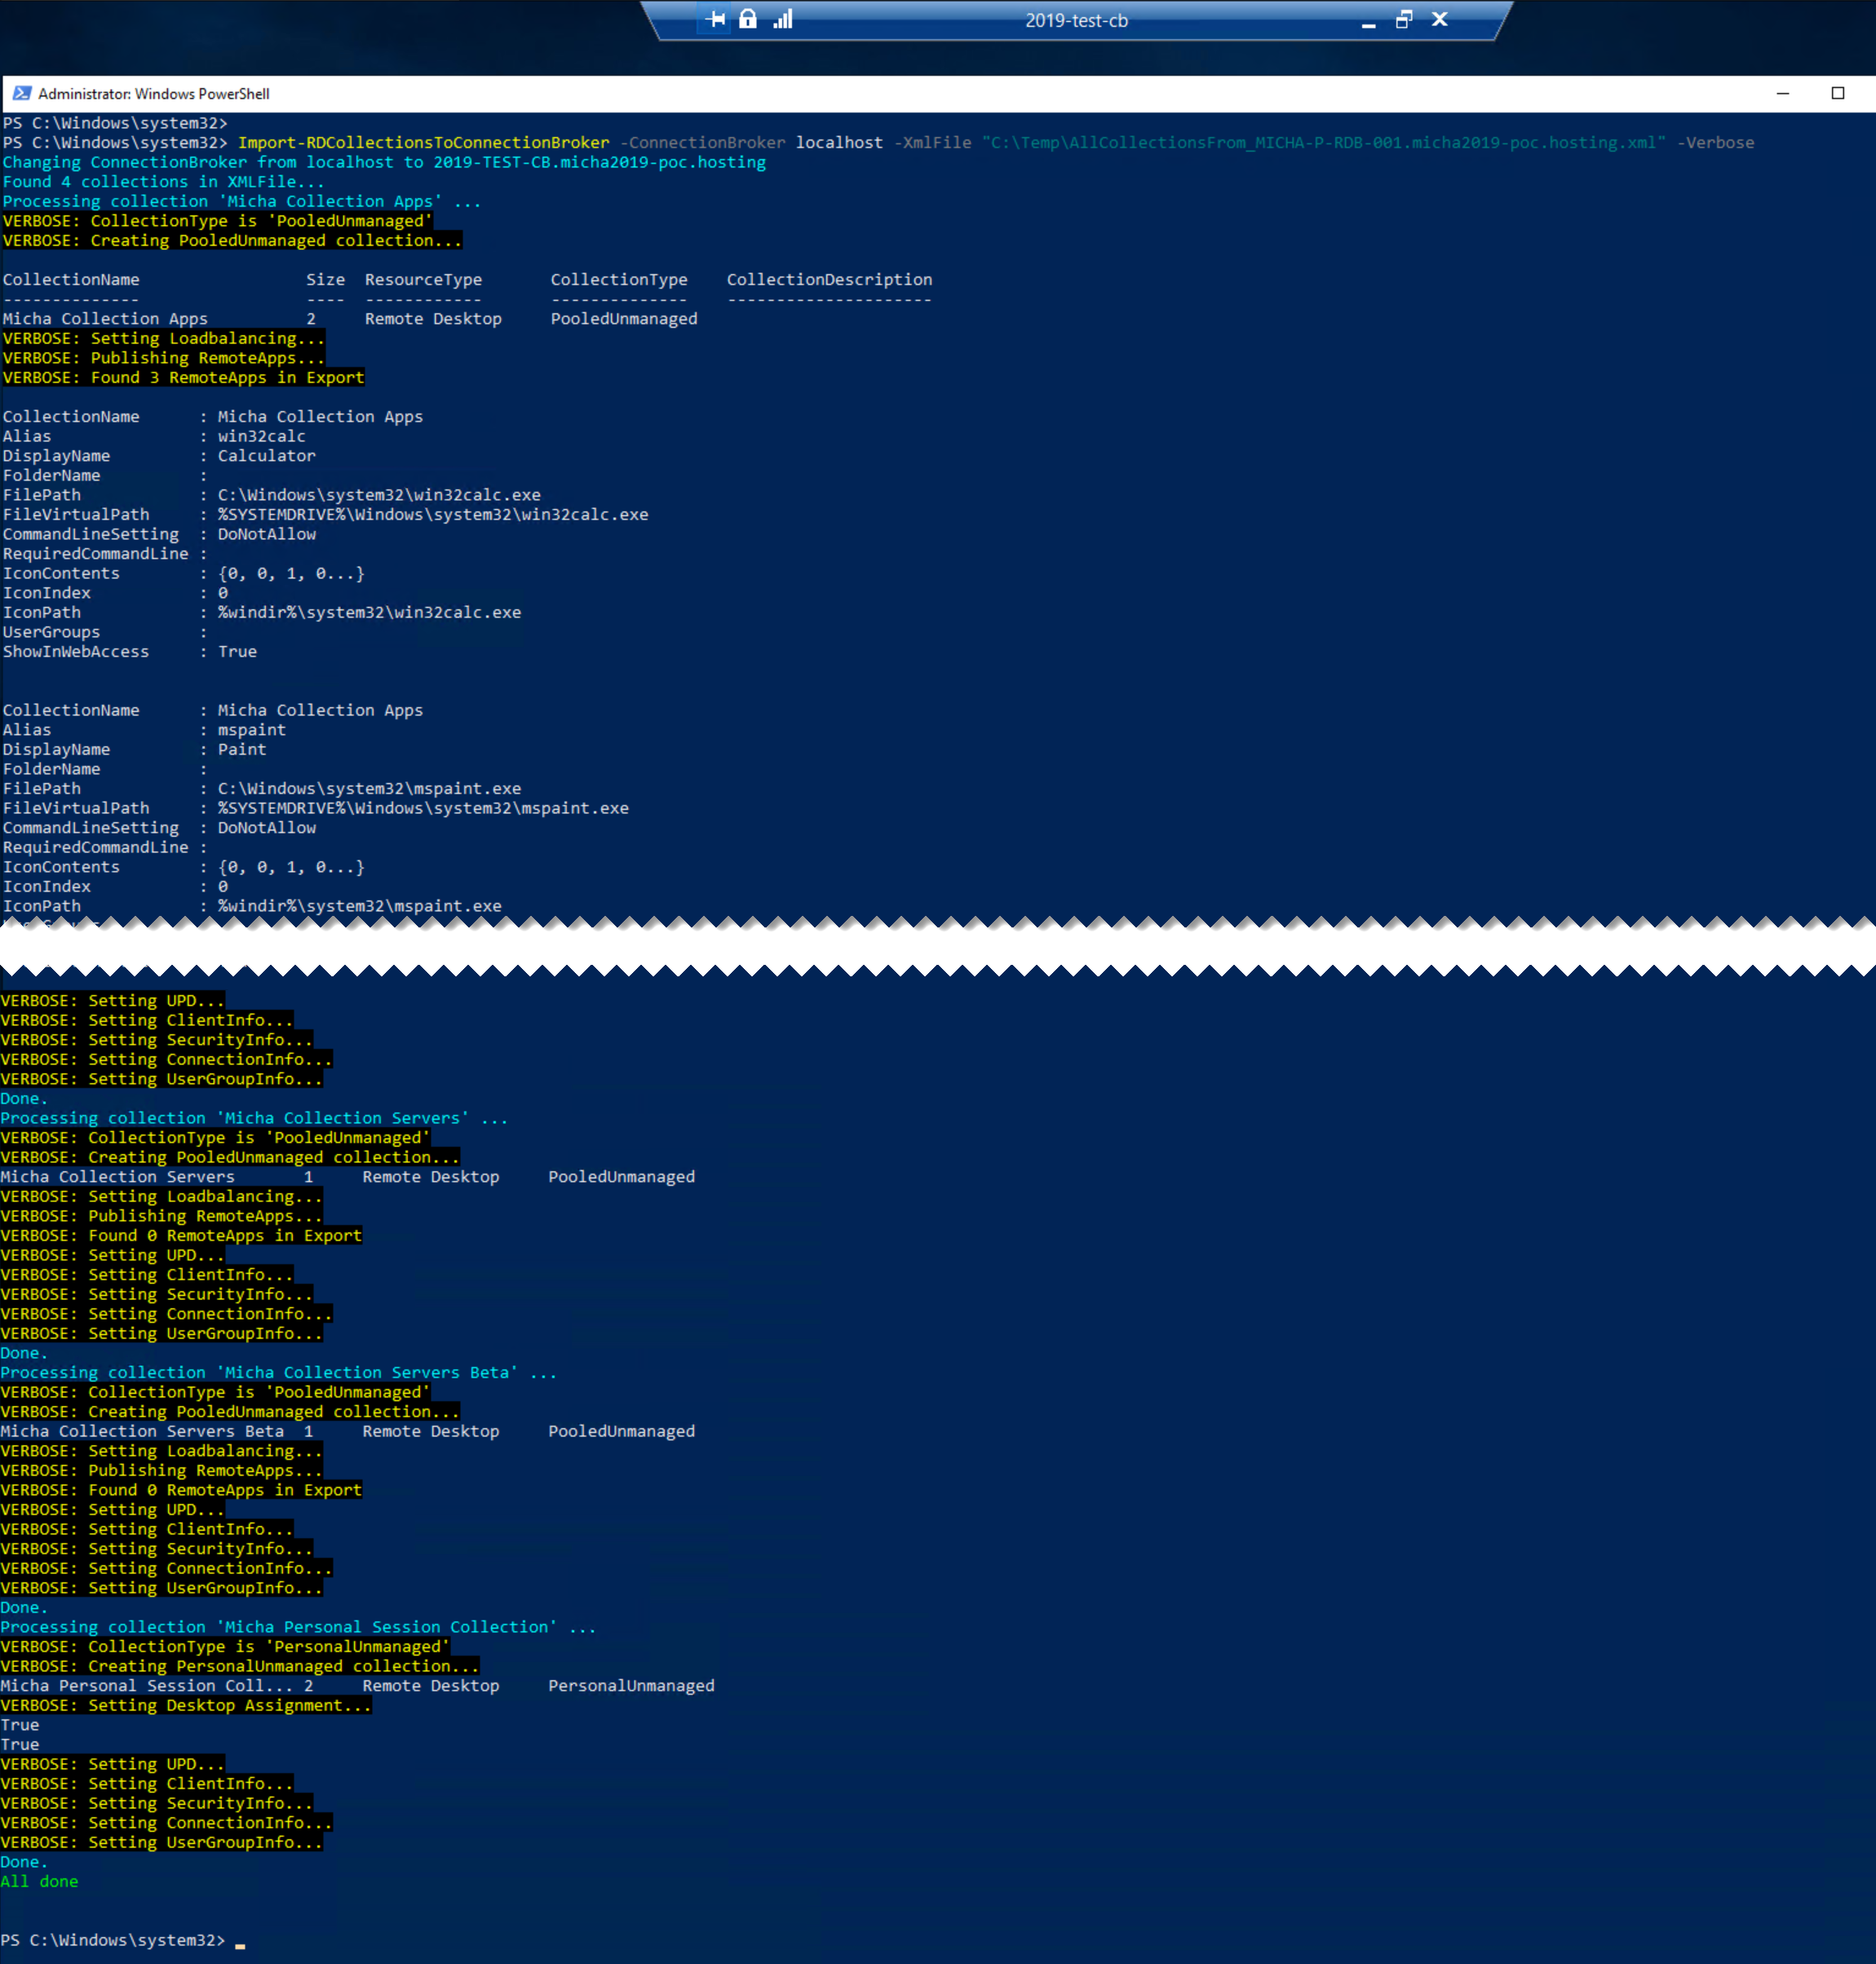
Import-RDCollectionsToConnectionBroker -ConnectionBroker localhost -XmlFile "C:\\Temp\\AllCollectionsFrom\_MICHA-P-RDB-001.micha2019-poc.hosting.xml" -Verbose
You must specify the ConnectionBroker and the XmlFile. And if you add -Verbose, you will get detailed steps in the progress.

When finished, you will see all Collections that are imported, including the published RemoteApps.
Overview after the migration
When you review the Server Manager, you will see that the entire Deployment is migrated. 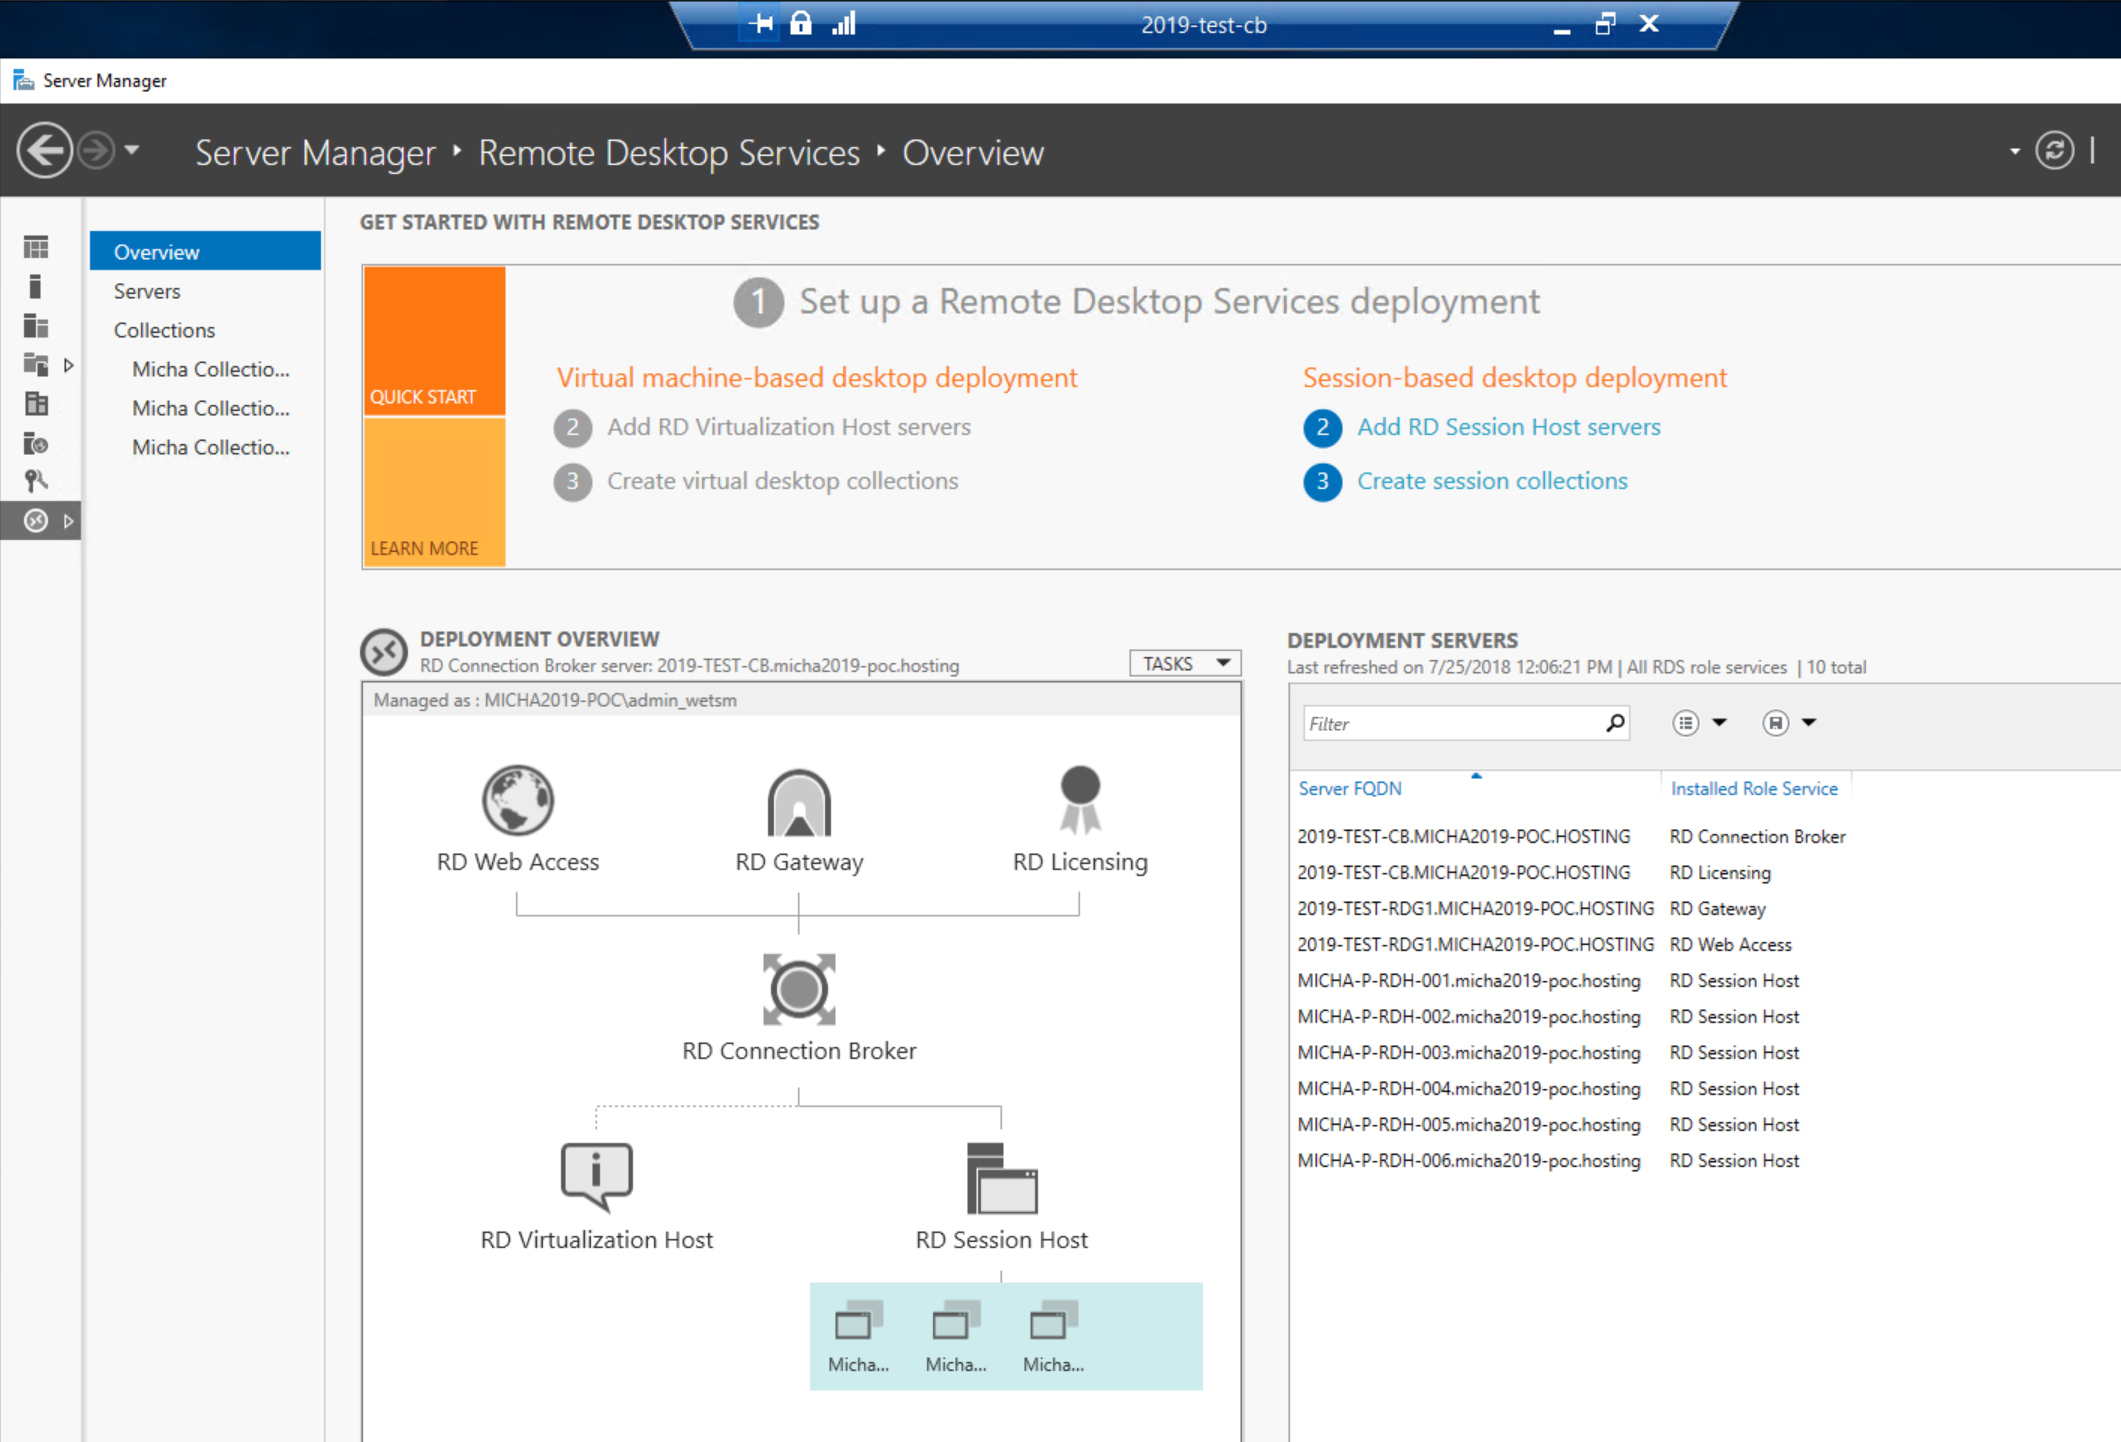
Also the Collections are completely migrated.
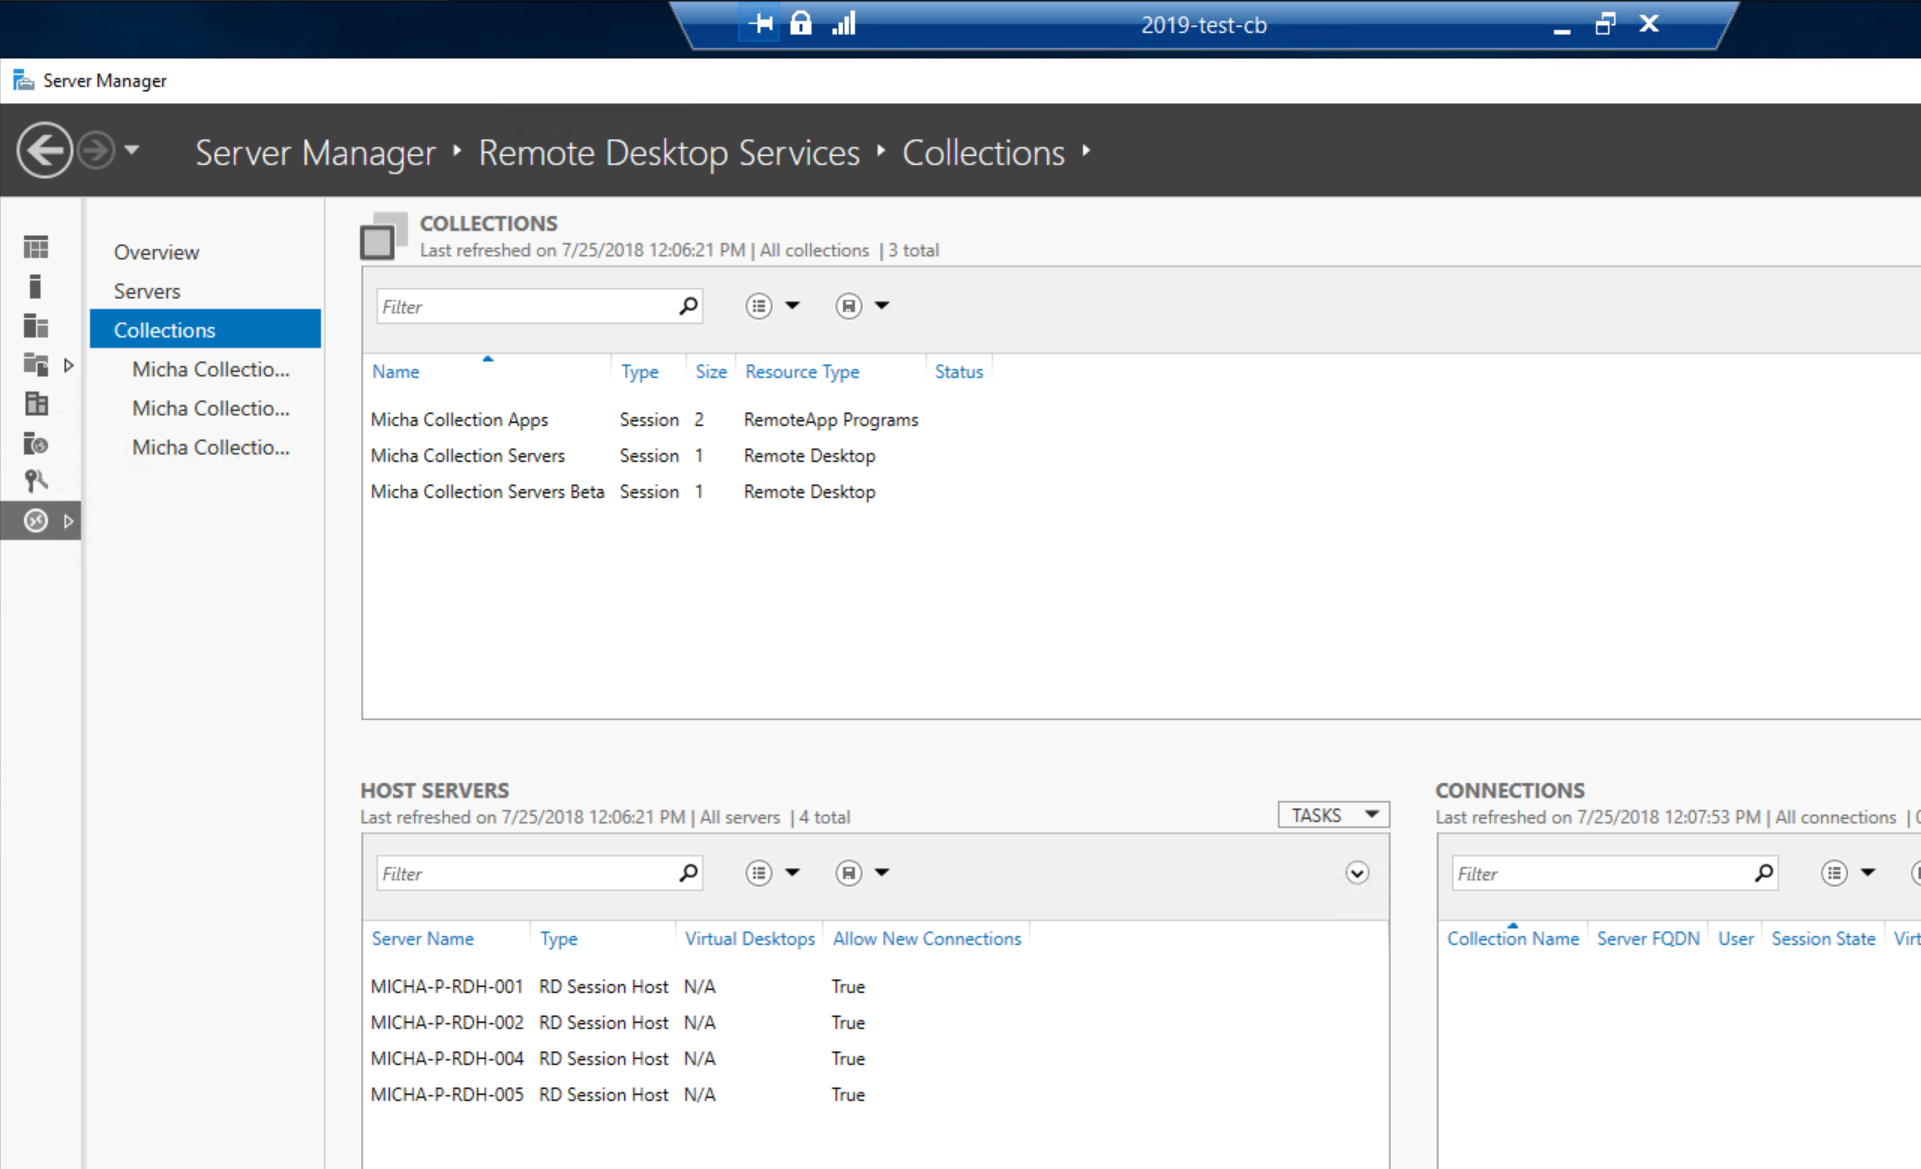
And the Personal Session Desktop Collection is also available again. 
Conclusion
Using this module, you are able to migrate your entire deployment in a controlled manner, on any platform (like Azure) and faster than performing an in-place upgrade.
You also completed step 1 and 2 from the guide in this article.
You can simple follow the guide further, or you can install your new Session Hosts, Gateway(s) and Web Access servers, and replace these in the new Deployment.
Comments
Previous Comments
| Kirt | September 20, 2018 at 9:48 pm |
|---|---|
Does this script work when the connection broker is already set to HA? I’ve been trying to migrate using the MS doc, but I’ve been unsuccessful. |
|
| Micha Wets | October 1, 2018 at 2:44 pm |
Hi Kirt, |
| Casper Andersen | January 22, 2019 at 9:23 am |
|---|---|
Hi – do I have to install the module on the new broker server ? |
|
| Micha Wets | February 24, 2019 at 11:06 am |
Hi Casper, |
| KingBuzzo | August 14, 2019 at 4:32 pm |
|---|---|
Great article…we have an existing WDI based broker pair in Domain A that we have migrated to Domain B and of course it is non-functional now. |
|
| Micha Wets | August 18, 2019 at 5:45 am |
Hi, |
|
| KingBuzzo | August 20, 2019 at 7:19 pm |
Ok great, thanks for getting back to me! |
| IT-Buster | October 22, 2019 at 1:07 pm |
|---|---|
Great article, thank you for your work! I`ve got one question. I have a 2012r2 and an 2016 rds environment, parallel and separate installed. And now, i want to migrate first the 2012r2 to the 2016 and after that, the the 2016 to a new 2019 rds environment. Can i migrate the 2012r2 environment to the 2016 without losing the actual 2016 rds configuration with this script? Or is that possible only to an “empty” 2016 installation? Best regards and have a nice day |
|
| Micha Wets | December 10, 2019 at 8:28 pm |
Hi IT-Buster, sorry for the delay! |
| Matthew | January 28, 2020 at 11:21 pm |
|---|---|
I am working on moving my Windows RD Session Host configuration from one server to another as the OS on the original server is having issues. I successfully exported the configuration, however, the guide states that I also need to export the Certificate(s) from the source server to the destination server and use them with the Import-RDDeploymentToConnectionBroker. I am just using self-signed certificates generated by the Windows Server OS during RDS deployment. I can’t export the private key for that self-signed cert. Is there a workaround for this type of situation? |
|
| Micha Wets | February 21, 2020 at 3:59 pm |
Hi Matthew, |
| Patrick | March 13, 2020 at 2:26 pm |
|---|---|
Hi Micha, what a great script! I was looking for this for a long time. In some environment we don’t use a Gateway service (Due to One-Way trust settings) The export will run without this component but the import results in missing data in the .xml. |
|
| Micha Wets | March 17, 2020 at 5:19 pm |
Hi Patrick, |
|
| Micha Wets | March 17, 2020 at 6:17 pm |
Hi Patrick, |
|
| Patrick | March 18, 2020 at 1:01 pm |
Wow, thats quick :-). I will try it tomorrow. I will let you know. Thank you. |
|
| Patrick | March 19, 2020 at 10:58 am |
Hi Micha, do we need to specify a special parameter to skip the Gateway config? |
|
| Micha Wets | March 19, 2020 at 3:30 pm |
Hi Patrick, |
|
| Patrick | March 20, 2020 at 2:50 pm |
Cmdlet worked flawless! Excellent work. The migration what could have take hours was now done in 25 minutes. A great solution with the auto skip for the gateway. Thank you. |
|
| Micha Wets | March 20, 2020 at 4:15 pm |
Hi Patrick, |